Getting started
This tutorial shows you how to use the languages that Slint supports as the host programming language.
We recommend using our editor integrations for Slint for following this tutorial.
Slint has application templates you can use to create a project with dependencies already set up that follows recommended best practices.
Prerequisites
Before using the template, you need a C++ compiler that supports C++ 20 and to install CMake 3.21 or newer.
Download and extract the ZIP archive of the C++ Template.
Rename the extracted directory and change into it:
mv slint-cpp-template-main memory
cd memory
Configure the project
The CMakeLists.txt uses the line add_executable(my_application src/main.cpp) to set src/main.cpp as the main C++ code file.
Replace the content of src/main.cpp with the following:
#include "app-window.h" // generated header from memory.slint

int main(int argc, char **argv)
{
    auto main_window = MainWindow::create();
    main_window->run();
}
Also in CMakeLists.txt the line
slint_target_sources(my_application ui/app-window.slint) is a Slint function used to
add the app-window.slint file to the target.
Replace the contents of ui/app-window.slint with the following:
export component MainWindow inherits Window {
    Text {
        text: "hello world";
        color: green;
    }
}
Configure with CMake:
cmake -B build
Tip
When configuring with CMake, the FetchContent module fetches the source code of Slint via git. This may take some time when building for the first time, as the process needs to build the Slint runtime and compiler.
Build with CMake:
cmake --build build
Run the application
Run the application binary on Linux or macOS:
./build/my_application
Or on Windows:
build\my_application.exe
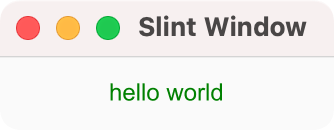
This opens a window with a green “Hello World” greeting.
If you are stepping through this tutorial on a Windows machine, you can run the application at each step with:
my_application
Download and extract the ZIP archive of the Node.js Template.
Rename the extracted directory and change into it:
mv slint-nodejs-template-main memory
cd memory
Install dependencies with npm:
npm install
Configure the project
The package.json file references src/main.js as the entry point for the application and src/main.js references memory.slint as the UI file.
Replace the contents of src/main.js with the following:
import * as slint from "slint-ui";

let ui = slint.loadFile("./ui/app-window.slint");
let mainWindow = new ui.MainWindow();
await mainWindow.run();
The slint.loadFile method resolves files from the process’s current working directory, so from the package.json file’s location.
Replace the contents of ui/app-window.slint with the following:
export component MainWindow inherits Window {
    Text {
        text: "hello world";
        color: green;
    }
}
Run the application
Run the example with npm start and a window appears with the green “Hello World” greeting.
We recommend using rust-analyzer and our editor integrations for Slint for following this tutorial.
Download and extract the ZIP archive of the Rust Template.
Rename the extracted directory and change into it:
mv slint-rust-template-main memory
cd memory
Configure the project
Replace the contents of src/main.rs with the following:
slint::include_modules!();

fn main() -> Result<(), slint::PlatformError> {
    let main_window = MainWindow::new()?;

    main_window.run()
}
Replace the contents of ui/app-window.slint with the following:
export component MainWindow inherits Window {
    Text {
        text: "hello world";
        color: green;
    }
}
Run the application
Run the example with cargo run and a window appears with the green “Hello World” greeting.